To use the Security Raters, you will need Microsoft Excel 97, or a higher version.
Click Security Raters to begin installation.
A Dialogue box will appear.

 Click Run
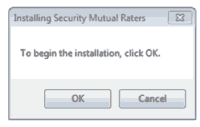
To begin the installation, click OK
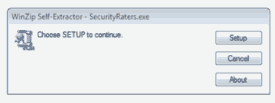
Choose Setup to continue
The Security Raters are now installed on your Hard Drive after this step.
To create a shortcut to use Security Raters, please complete the following steps:
Go to your Local Disk (C:) or Hard Disk Drive
Open the folder labeled SEC_Raters
Move the Shortcut labeled Security Raters to your desktop or any other folder of your choice.

 If there is already a file with the same name in this location,
choose Copy and Replace.
Security Raters include macros and the content will need to be enabled.
How to create a trusted location:
Using macros in a file means it poses a security threat: macros can be programmed to run whenever the file is opened and they can do all sorts of nasty things, like deleting all the files on your hard drive. For that reason, when Microsoft Excel detects that a file contains macros it will allow you to open the file but will disable all macros.
By and large this is a sensible thing and you want this to happen – unless you trust the source of the file. If you know the file is safe you should tell Excel you trust it, and you do that by saving the file in a folder designated as a “trusted location”. You can designate as many folders as you want as safe, and you also have the option of including subfolders. Here is how you do it.
Excel 2010 and Newer Versions
Excel 2007


